As with all seasons, winter will come to an end, and when that cold goes away and the thaw starts, farmers will need to keep an eye on their pastures, and their calves. Here's our guide to help make sure that your calving season goes off without a hitch.
Calving Kits
One of the first things that you're going to want to do ahead of time is to prep a calving kit ahead of time. This kit will allow farmers to take care of some issues they otherwise couldn't if they were caught unprepared. When prepping a calving kit, make sure to include lubricant, palpation sleeves, colostrum supplement, towels, an esophageal feeder, calving chains, bucket, water, flashlight, rope ahlter, catch rope, the phone number of at least two different veterinarians (in case you've reached a point where you require professional help), and possibly a heat source. You should not include a calf jack as part of your prep kit, because the use of these usually indicates that it's time to call in the vet.
Define Your Breeding Season
When prepping for calving, it's best to have a very defined breeding season. By having your breeding season defined, it allows you to have a great advantage at calving time in that it will define the beginning and end of your calving season. For best practice, the shorter the breeding time the better. Additionally, find out if any information is known about the sire such as birth weight indicators and other factors. This information along with regular checks throughout gestation could help prevent potential mishaps and problems during calving.
Familiarize Yourself
What we mean by this is know what is normal during the calving process and the visual signs associated with each part. The first stage of birth would be the presentation of the water bag and its breaking. This indicates the start of the process and the fluid released is to lubricate the birth canal. This beginning step normally takes between 2 to 6 hours, depending on the age of the cow. Heifers usually take longer than old cows.
The second part of this is the presentation of the calf. Typical presentations starts with the appearance of two feet and a nose, the soles of the hooves should be pointed downward during a normal birth. If the hooves are pointed upward, this usually indicates a breach. Backwards presentations indicate a more difficult birth. After the presentation of the head and front quarters, this is followed closely by the rear quarters. The presentation stage can take anywhere from a few minutes to an hour, depending on the cow and the calf's weight. Again, heifers will normally take longer than mature cows as well as heavier births can increase birthing times.
Finally, there is the elimination of the afterbirth. This stage can take up to 8 hours to complete, but, if it lasts longer than that, seek professional help as the cow has probably retained the afterbirth. Under absolutely no circumstances should the afterbirth be removed by pulling on a portion that is outside the animal. Removing afterbirth is the job of the professional. If you're familiar and comfortable about the normal birth process you should be prepared to assist the vet if needed.
When Assistance Is Needed During Calving
When it's determined that professional assistance is needed there are a few practices that are important to know. Firstly, you should prepare lubricant for the birth canal. This can be done with a commercially available lubricant, or by prepping a mixture of water and Metamucil, if you need to. Don't be afraid of using too much lubricant, you cant over use it, so make sure to apply it liberally to all surfaces of the calf and inside the birth canal.
Next, make sure to clean out the inside of the cow as thoroughly as possible, carefully removing all foreign matter that could carry bacteria and result in an infection of the uterus. Make sure to use a mild disinfectant such as betadine, in the wash solution to help lessen the chance of infection further.
When needing the calving chains, make sure that when you are attaching the chains to the legs, that the first loop is placed above the pastern joint, and a half hitch placed between the hoof and pastern joint. By placing the chains as described above on both legs, it will lessen the chance that the leg structure is damaged during the pulling process. During this, you have to make sure that you check your progress often, and re-apply lubricant as necessary.
Afterbirth Care For The Calf
One of the first things that you're going to want to do with the newborn, is making sure that it nurses after birth. The ingestion of colostrum within the first 12 hours is essential in establishing passive immunity in the calf and is paramount to its survival. Additionally, after the calf is warm and has ingested the colostrum, you're going to want to make sure that the calf is warm and dry. It's recommended that the cow attends to this as it allows time for bonding between the cow and the calf. If the calf is weak, you might want to dry the calf and provide warmth yourself.
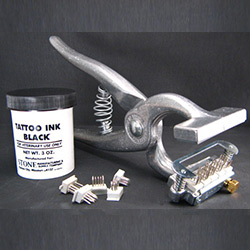
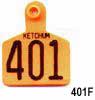
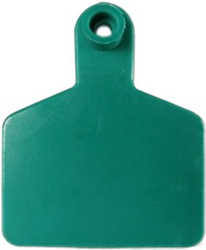
Once the process is complete, you're going to want to tag the new calves as soon as possible. This is useful internally to know what cows are being used as replacements and those that are going to market. Also, if you have an expansive property, tagging allows you to quickly identify your calves and prevent theft. Additionally, you can tattoo your calves as an alternative to a physical tag.