Plastic Ear Tags
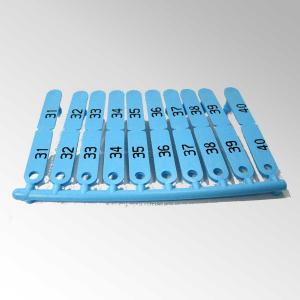
Like our metal ear tags, our Ovitag plastic ear tags are a popular choice for livestock owners and farmers. Made of tough nylon, these ear tags are durable and long-lasting. Because they come in six different colors (yellow, orange, blue, green, white, and red), they can be used to mark vaccinations and easily distinguish the breed and age of the tagged animals. They are especially suitable for sheep, goats, and other thin-eared animals. Depending on the specific application, tags can be blank, numbered, lettered, or numbered and lettered.
Are you thinking of adding sheep to your livestock? Or are you looking to start and need some helpful information. Well we've put together a great guide to choosing sheep breeds and lambing: Click Here to See.
A Brief Guide to Ear-tagging Sheep
Whether you are a large livestock farmer or a sheep-raising hobbyist, livestock management need not be a costly enterprise. Tagging sheep and lambs with plastic ear tags is surely one of the easiest and most inexpensive methods of keeping track of your animals. As long as you are good at maintaining accurate records and meticulous in following antiseptic procedures when tagging your sheep, you will be successful. Here are the basic steps:
- 1. It starts with choosing the right tool—namely, the Ovitag Applicator and a set of properly numbered and/or lettered Ovitag Tags.
- 2. Load the tag in the Ovitag Applicator. Notice there is a male side (with a pin) and a female side (with a hole).
- 3. Dip the applicator and ear tag in a disinfectant solution to kill any germs on the surface of the tag.
- 4. Holding the lamb or sheep steady, place the applicator in position over the ear. Placement is important! There is a vein running the length of the ear, and the tag should be placed either above or below the vein. If you hit the vein, it hurts the animal a little bit more, it will bleed, and you risk infection. On the other hand, if the tag is too near the outside of the ear, you risk the tag being torn off; but if you’re too close to the head, the tissue is thicker and it’s more difficult to insert the tag.
- 5. Once you have positioned the tag correctly, quickly squeeze the pliers so the pin penetrates the ear and enters the hole at the other end of the tag.
- 6. Release the pliers, and clean the tagged area of the ear with disinfectant.